
Understanding Iliotibial Band Syndrome
Iliotibial band syndrome (ITBS) arises from inflammation‚ impacting the distal IT band; rehabilitation exercises‚ guided by healthcare professionals‚ are crucial for recovery and pain management.
What is the Iliotibial Band?
The iliotibial (IT) band is a thick band of fibrous tissue that runs along the outside of your thigh‚ extending from the hip to just below the knee. It’s not a muscle itself‚ but rather a strong connective tissue that plays a vital role in stabilizing the knee and hip during movement.
Essentially‚ it assists in movements like walking‚ running‚ and cycling. However‚ the IT band doesn’t stretch much‚ and friction can develop where it rubs against the bony prominence on the outside of the knee. This friction‚ coupled with repetitive movements‚ can lead to irritation and inflammation – the hallmark of IT band syndrome. Understanding its structure and function is key to comprehending why this condition occurs and how targeted exercises can help alleviate symptoms and restore proper biomechanics.
Causes of IT Band Syndrome
IT band syndrome typically develops due to repetitive friction between the iliotibial band and the lateral femoral epicondyle – the bony bump on the outside of the knee. Several factors contribute to this friction. These include overuse‚ particularly in activities like running‚ cycling‚ and hiking‚ and inadequate warm-up routines before exercise.
Poor biomechanics‚ such as overpronation (rolling inward of the foot)‚ weak hip abductors‚ and tight tensor fasciae latae (TFL) muscle‚ can also exacerbate the issue. Improper training techniques‚ like suddenly increasing mileage or intensity‚ and anatomical variations can also play a role. Addressing these underlying causes‚ alongside targeted exercises focused on strengthening and flexibility‚ is crucial for effective management and prevention of IT band syndrome.
Common Symptoms
The hallmark symptom of iliotibial band syndrome is pain on the outside of the knee. Initially‚ this pain may appear during activity‚ gradually worsening with continued exertion. It often starts as a mild ache but can progress to a sharp‚ burning sensation. Pain typically flares up during or after running‚ cycling‚ or stair climbing.
Individuals may experience tenderness to the touch over the lateral femoral epicondyle. Stiffness and tightness in the IT band itself are also common. In some cases‚ clicking or snapping sensations may be felt in the knee. The pain can radiate up the thigh‚ though this is less frequent. It’s important to note that symptoms can mimic other knee conditions‚ so accurate diagnosis‚ potentially alongside a tailored exercise plan‚ is essential.
Pre-Exercise Considerations
Before starting exercises‚ assess your pain level and prioritize a thorough warm-up; proper form is paramount to avoid exacerbating the iliotibial band syndrome.
Pain Level Assessment
Prior to initiating any exercise regimen for iliotibial band syndrome (ITBS)‚ a meticulous pain level assessment is absolutely essential. This isn’t merely about identifying the presence of pain‚ but understanding its intensity‚ location‚ and how it fluctuates with different movements. Begin by rating your pain on a scale of 0 to 10‚ where 0 represents no pain and 10 signifies the worst imaginable pain.
Note specifically where you feel the discomfort – is it localized to the outside of the knee‚ or does it radiate up the thigh? Pay attention to what activities aggravate the pain. Does it worsen during running‚ cycling‚ or even prolonged sitting? A little discomfort during exercises might be tolerable‚ but any sharp or increasing pain is a clear signal to stop immediately. Your healthcare provider or physical therapist will guide you on appropriate pain thresholds for each exercise‚ ensuring a safe and effective rehabilitation process.
Warm-up Importance
A comprehensive warm-up is non-negotiable before embarking on any exercises designed to address iliotibial band syndrome (ITBS). The purpose extends beyond simply preparing the muscles; it’s about increasing blood flow to the IT band and surrounding tissues‚ enhancing flexibility‚ and priming the neuromuscular system for activity. A dynamic warm-up‚ incorporating movements like leg swings‚ hip circles‚ and torso twists‚ is far more beneficial than static stretching before exercise.
Gradually increase the intensity of your movements‚ mimicking the actions you’ll be performing during your rehabilitation routine. This prepares the IT band for the stresses it will encounter. A proper warm-up reduces the risk of exacerbating inflammation and allows for a more effective and comfortable exercise session. Remember to listen to your body and avoid pushing through any pain during the warm-up phase; it’s a preparation‚ not a test of endurance.
Proper Form Focus
Maintaining impeccable form during all iliotibial band syndrome (ITBS) exercises is paramount to achieving positive outcomes and preventing further injury. Incorrect technique can not only diminish the effectiveness of the exercise but also potentially worsen the inflammation and pain associated with ITBS. Prioritize controlled movements over speed or the number of repetitions.
Focus on engaging the correct muscle groups throughout each exercise‚ particularly the glutes and hip abductors‚ which play a crucial role in stabilizing the pelvis and reducing stress on the IT band. If you’re unsure about proper form‚ seek guidance from a physical therapist or qualified healthcare professional. Start slowly‚ and if you experience any pain‚ immediately stop and reassess your technique. Quality of movement always trumps quantity; a few perfect repetitions are far more valuable than many flawed ones.
Stretching Exercises
Effective exercises for IT band syndrome include standing and lying IT band stretches‚ alongside hip flexor stretches‚ promoting flexibility and alleviating discomfort.
Standing IT Band Stretch
To perform the standing iliotibial band stretch‚ begin by standing tall and holding onto a stable surface‚ such as the back of a chair or a wall‚ for balance. Cross the affected leg behind the other leg‚ creating a slight crossover. Gently lean towards the side of the crossed leg‚ keeping your back straight and core engaged.
You should feel a stretch along the outside of your hip and thigh. Hold this position for approximately 20-30 seconds‚ ensuring you maintain a controlled and comfortable stretch. Avoid bouncing or jerking movements. Repeat the stretch 2-3 times on each side.
Remember to listen to your body and stop if you experience any sharp pain. A mild discomfort is normal‚ but pushing through significant pain could worsen your condition. This stretch helps to improve flexibility in the IT band and surrounding tissues‚ contributing to pain reduction and improved function.
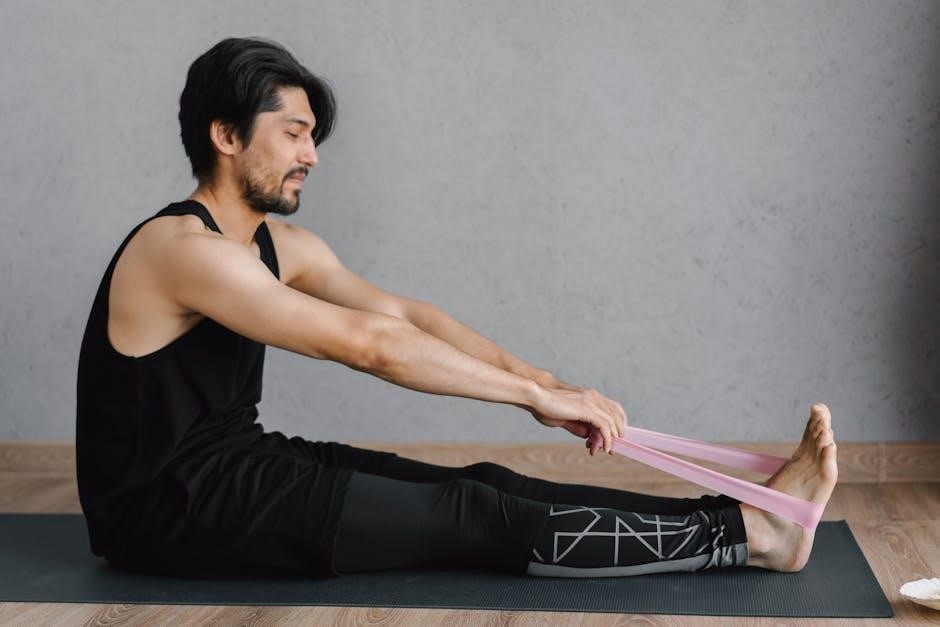
Lying IT Band Stretch
The lying IT band stretch offers another effective way to target the iliotibial band. Begin by lying on your side with the affected leg extended straight and the other leg bent for stability. Reach across your body with the hand on the same side as the extended leg‚ and gently pull your foot towards your opposite shoulder.
Maintain a straight back and avoid twisting your torso. You should feel a stretch along the outer thigh and hip. Hold this position for 20-30 seconds‚ breathing deeply and relaxing into the stretch. Repeat the stretch 2-3 times on each side.
As with all stretches‚ avoid bouncing or forcing the movement. Discomfort is acceptable‚ but stop immediately if you experience sharp pain. This stretch is beneficial for increasing flexibility and reducing tension in the IT band‚ aiding in the rehabilitation process.
Hip Flexor Stretch
Tight hip flexors can contribute to IT band syndrome‚ making a dedicated stretch essential. Begin in a kneeling position‚ with one knee on the ground and the other foot flat on the floor in front of you‚ forming a 90-degree angle. Gently lean forward‚ keeping your back straight and core engaged.
You should feel a stretch in the front of the hip of the kneeling leg. To deepen the stretch‚ slightly tuck your tailbone under and push your hips forward. Hold this position for 20-30 seconds‚ breathing deeply and maintaining a controlled movement;
Repeat the stretch 2-3 times on each side. Avoid arching your lower back. A tight hip flexor can pull on the pelvis‚ increasing stress on the IT band‚ so regular stretching is vital for recovery and prevention.
Strengthening Exercises
Strengthening key muscle groups – glutes‚ hip abductors‚ and quadriceps – provides crucial support and stability‚ addressing imbalances contributing to iliotibial band syndrome.
Gluteus Maximus Strengthening
A weak gluteus maximus significantly contributes to IT band syndrome‚ as it impacts pelvic and leg alignment during movement. Strengthening this muscle is paramount for effective rehabilitation. Begin with exercises like glute bridges – lying on your back with knees bent‚ lift your hips off the floor‚ squeezing your glutes at the top.
Progress to single-leg glute bridges for increased challenge. Another excellent exercise is hip thrusts‚ utilizing a bench for greater range of motion and resistance. Consider incorporating banded lateral walks‚ placing a resistance band around your ankles or thighs and stepping sideways‚ maintaining tension on the band.
Focus on controlled movements and proper form throughout each exercise. Remember to start slowly and gradually increase the intensity and repetitions as your strength improves. Discomfort is normal‚ but stop if you experience sharp pain. Consistent gluteus maximus strengthening will help restore proper biomechanics and alleviate IT band stress.
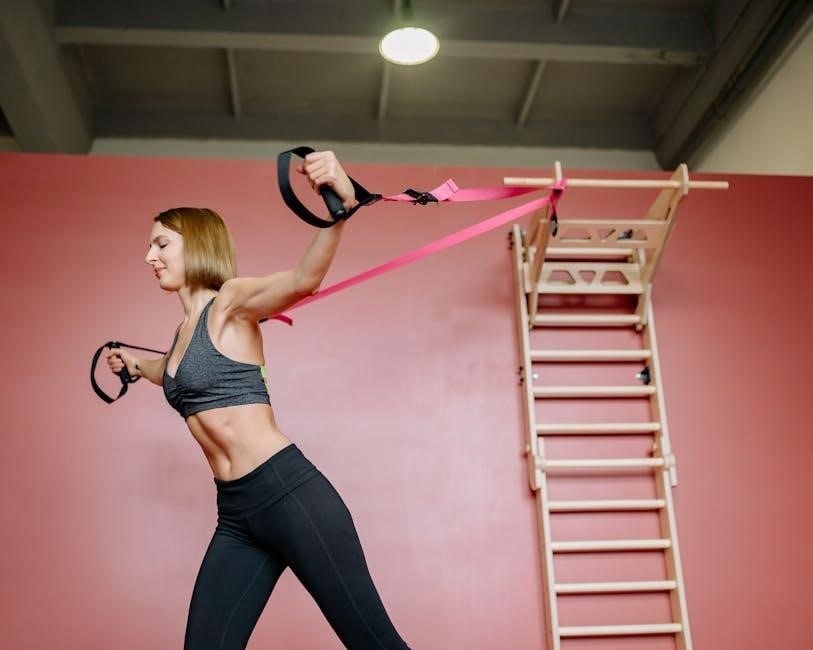
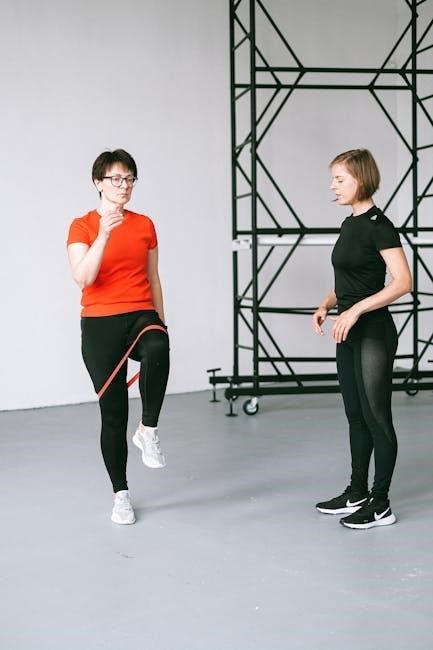
Hip Abductor Strengthening
Weak hip abductors contribute to poor pelvic control‚ increasing stress on the IT band. Strengthening these muscles is vital for restoring proper biomechanics and preventing recurrence of IT band syndrome. Begin with side-lying leg lifts‚ keeping your leg straight and slowly raising it towards the ceiling. Focus on controlled movements‚ avoiding momentum.
Progress to exercises utilizing resistance bands. Place a band around your ankles and perform lateral walks‚ maintaining tension throughout the movement. Clamshells are another effective exercise – lying on your side with knees bent‚ keep your feet together and lift your top knee‚ squeezing your glutes.
Ensure proper form‚ engaging your core and avoiding arching your back; Gradually increase the resistance or repetitions as your strength improves. Remember‚ a little discomfort is acceptable‚ but stop if you experience sharp pain. Consistent hip abductor strengthening will enhance pelvic stability and reduce IT band strain.
Quadriceps Strengthening
Strong quadriceps muscles are essential for controlling knee movement and reducing stress on the IT band. Weak quads can contribute to altered biomechanics‚ exacerbating IT band syndrome. Begin with static quadriceps contractions – sitting with your leg extended‚ tighten your thigh muscles and hold for several seconds. This builds initial strength without joint movement.
Progress to exercises like straight leg raises‚ performed while lying down. Ensure you maintain a controlled motion and avoid arching your back. Wall sits are also beneficial; lean against a wall with your knees bent at a 90-degree angle and hold the position.

As strength improves‚ incorporate step-ups and lunges‚ focusing on proper form and controlled descent. Remember to start slowly and gradually increase the intensity. Discomfort is normal‚ but stop if you experience sharp pain. Consistent quadriceps strengthening supports knee stability and minimizes IT band irritation.
Foam Rolling & Self-Massage
Foam rolling targets muscle tightness‚ improving flexibility and reducing IT band discomfort; techniques for the IT band‚ quads‚ and glutes aid recovery and mobility.
IT Band Foam Rolling Technique
Foam rolling the IT band requires a specific technique for optimal benefit and to avoid exacerbating pain. Begin by positioning yourself sideways‚ supporting your weight on your forearm and the outer leg. Place the foam roller just below your hip‚ on the outer thigh.
Slowly roll from just below the hip to just above the knee‚ pausing on any particularly tender spots for approximately 30 seconds. This pause allows the muscle to relax and release tension. Maintain a controlled pace‚ avoiding rapid or bouncing movements.
It’s common to experience discomfort‚ but sharp or intense pain indicates you should stop. Focus on breathing deeply throughout the process. Repeat this rolling motion for 60-90 seconds per leg. Remember‚ consistency is key; incorporate this technique into your routine several times a week to promote long-term relief and improved flexibility.
Quadriceps Foam Rolling
Foam rolling the quadriceps is a valuable addition to an IT band syndrome treatment plan‚ as tight quads can contribute to IT band issues. Lie face down with the foam roller positioned under your thighs. Support your upper body with your forearms.
Slowly roll from just above the knee to the hip‚ pausing on any tender spots for 30-60 seconds. Maintain a controlled pace‚ avoiding bouncing. Focus on deep‚ controlled breaths to help relax the muscles.
You should feel a comfortable pressure‚ but stop if you experience sharp pain. This technique helps release tension in the quadriceps‚ improving flexibility and reducing strain on the IT band. Repeat the rolling motion for 60-90 seconds per leg‚ several times a week‚ to enhance recovery and prevent recurrence of symptoms.
Glute Foam Rolling
Foam rolling the gluteal muscles is essential‚ as weak or tight glutes can contribute to IT band syndrome. Sit on the floor with the foam roller positioned under one buttock. Cross the ankle of the leg you’re rolling over the opposite knee.
Lean slightly to the side of the leg you’re rolling‚ supporting yourself with your hands. Slowly roll back and forth‚ focusing on tender areas. Pause on these spots for 30-60 seconds‚ breathing deeply to promote muscle relaxation.
Avoid rolling directly on the lower back or sciatic nerve. This technique helps release tension in the glutes‚ improving hip stability and reducing stress on the IT band. Perform this for 60-90 seconds per side‚ several times weekly‚ to support rehabilitation and prevent future issues.
Rehabilitation Protocol Overview
A structured rehabilitation protocol‚ encompassing acute‚ intermediate‚ and advanced phases‚ is vital for IT band syndrome recovery‚ guided by individual tolerance and tissue healing.
Phase 1: Acute Phase (Pain Reduction)
The initial acute phase focuses primarily on diminishing pain and inflammation associated with iliotibial band syndrome. During this stage‚ aggressive stretching and strengthening exercises are generally avoided‚ as they could exacerbate the condition. Instead‚ the emphasis is on relative rest‚ modifying activities to reduce stress on the IT band‚ and employing modalities like ice to control swelling.
Gentle range-of-motion exercises may be introduced to maintain joint mobility without provoking pain. A key component is patient education‚ emphasizing activity modification and proper biomechanics. The goal isn’t to ‘fix’ the problem immediately‚ but to create an environment conducive to healing. Healthcare providers will assess pain levels and functional limitations to guide progression. This phase typically lasts until pain subsides significantly during daily activities and a basic level of comfort is achieved. Remember to stop any exercise that causes pain.
Phase 2: Intermediate Phase (Strength & Flexibility)
As pain diminishes‚ the intermediate phase transitions towards restoring strength and flexibility. This involves a gradual introduction of targeted exercises‚ carefully monitored for symptom provocation. Strengthening focuses on the gluteus maximus‚ hip abductors‚ and quadriceps – muscles crucial for pelvic and lower limb stability. Exercises should start slowly‚ increasing intensity as tolerated.
Flexibility work progresses beyond gentle range of motion to include static stretches for the IT band‚ hip flexors‚ and hamstrings. Foam rolling can also be incorporated to address soft tissue restrictions. The aim is to correct muscle imbalances contributing to IT band stress. Progression is criterion-based‚ meaning advancement depends on achieving specific milestones‚ like pain-free movement and improved strength. Healthcare providers will continually assess and adjust the rehabilitation program based on individual responses‚ ensuring a safe and effective recovery.
Phase 3: Advanced Phase (Return to Activity)
The advanced phase focuses on a progressive return to desired activities‚ building upon the strength and flexibility gained in previous phases. This stage involves functional exercises mimicking the demands of the individual’s sport or activity. Proprioceptive training is crucial‚ enhancing joint awareness and stability to prevent re-injury. Gradual increases in activity volume and intensity are key‚ carefully monitoring for any recurrence of symptoms.
Continued strengthening and stretching remain essential‚ serving as maintenance and preventative measures. A tailored program‚ guided by a healthcare professional‚ ensures a safe and controlled return. This phase emphasizes retraining proper biomechanics and addressing any remaining movement impairments. Successful completion requires consistent adherence to the program and a mindful approach to activity modification‚ allowing the body to adapt and withstand increasing loads without symptom flare-ups.
Leave a Reply